Level 2: PCB-Design & GPIO-Viewer
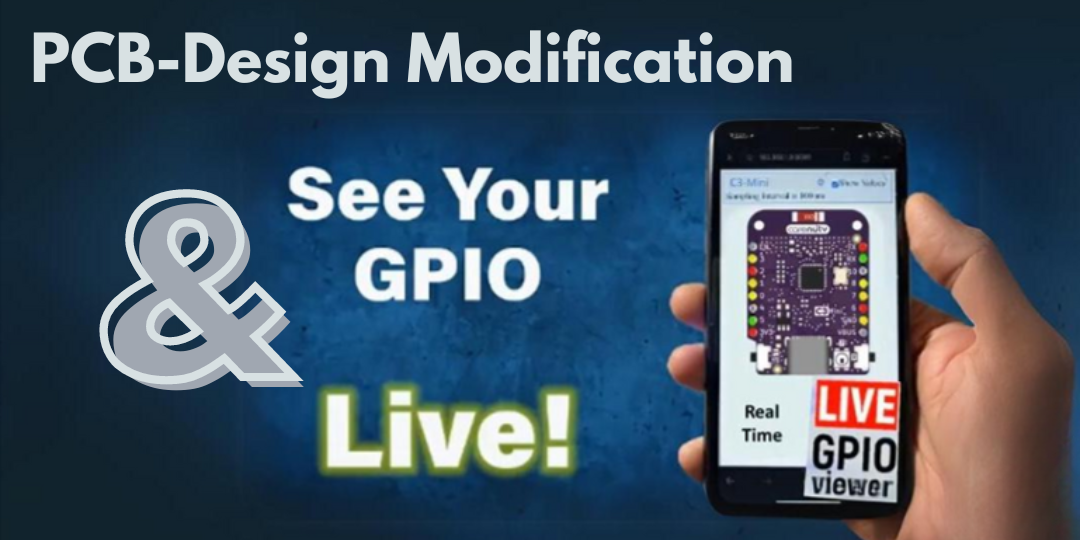
Show Pins by GPIO-Viewer and modify a PCB-Design with KiCAD
GPIO Viewer & PCB-Desing (add your own logo) design modification
In this level, PCB design modification skills are practiced using the KiCAD tool. Upon completion of this course, students will be able to update and store a PCB design and furthermore monitor the pins of a microcontroller live on their smartphone.
Summary for this Level
The second level introduces students to the PCB design using KiCAD and the GPIO Viewer. Students will learn to modify a printed circuit board (PCBs) design, including the integration of a custom logos or symbol of their choice. This level emphasizes basics of PCB design and the importance of understanding GPIO pins, which are crucial for creating aesthetically pleasing and functional electronic devices. By mastering these skills, students will gain confidence to handle their own PCBs and understand the intricacies of hardware design, preparing them for more advanced tasks in the subsequent levels.
| Level of Difficulty: Basic | Tutor: Timothy |
Tutorial for this level
Deliverables for achieving Level 2
To achieve Level 2, two tasks must also be mastered: Firstly, the silkscreen of a PCB design must be modified as described in the video. PCB design data is available for this in the repository https://github.com/Carenuity/KiCAD-PCB. Another PCB can also be modified. Your own logo should be placed so that it is suitable as a gift or recognizable as your own product. The result to share are so-called Gerber data (zip file).
In the second part, an app is to be installed on the C3-Mini, namely the 'GPIO Viewer App', which can be found on the website https://carenuity.com/c3-mini. There you can also find detailed instructions for removing the metal frame and programming the C3-Mini for the first time. Note: For running the app, it is not necessary to enter your own SSID and password, as the GPIO-Vviewer can also be used on the specified address 192.168.4.1, i.e. it does not have to be integrated into your home network. The password is password.
For Level 2, the Gerber data (ZIP) and a screenshot of your smartphone showing the GPIO-Viewer App must be sent by e-mail to team@carenuity.com.
Gained Tech Competences
Remembering: Level 2 introduces students to the world of PCB (Printed Circuit Board) design. Understanding: Using the GPIO Viewer, students will monitor pins and re-design their own PCBs, including adding their custom logo. Applying: This level emphasizes the importance of precise design and modification skills using tools like KiCAD. Analyzing: By completing this level, students will gain familiarity in PCB design and the ability to re-design customized electronic components. Evaluating: By the reward, an OLED display, students get their hands on a flexible printed circuit board.
Gained Soft Skills
Remembering: Level 2 focuses on teamwork and collaboration as students may seek feedback on their PCB designs. Understanding: They will improve their adaptability by learning to use new tools like KiCAD. Applying: Leadership and initiative are fostered as they take ownership of their own design project. Analyzing: Attention to detail is further developed through precise PCB re-design, and creativity is encouraged in adding custom logos.
Summary for this Level
The second level introduces students to the PCB design using KiCAD and the GPIO Viewer. Students will learn to modify a printed circuit board (PCBs) design, including the integration of a custom logos or symbol of their choice. This level emphasizes basics of PCB design and the importance of understanding GPIO pins, which are crucial for creating aesthetically pleasing and functional electronic devices. By mastering these skills, students will gain confidence to handle their own PCBs and understand the intricacies of hardware design, preparing them for more advanced tasks in the subsequent levels.
